




LATEX PROSTHETICS
Latex prostetics

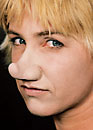
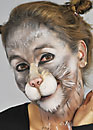
Latex Prosthetics are handmade latex prosthetics that allow you to create a dramatic and realistic effect in no time at all. The range is extensive and versatile, suitable for theatre, carnival, film, television and first aid training.

Grimas Latex Prosthetics consists of:
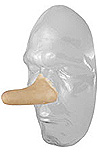
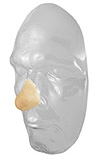
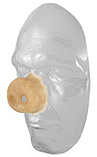
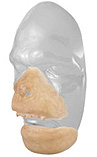
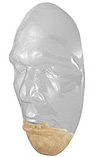
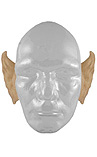
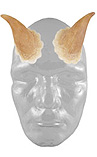
Facial parts: Noses, nose tips, snouts, chins, ears, horns and full faces.
Wounds: Various latex wounds for quickly creating realistic wounds.

With careful use and maintenance, these prosthetics can be used multiple times.

Procedure

Preparation and positioning
Remove the prosthesis from its packaging and first place it 'dry' on the skin to determine the correct position.
Positioning: Determine the exact location. This is crucial for noses, chins and muzzles to ensure a symmetrical result.
Shape retention: For hollow parts, such as a nose or snout, it is advisable to place a small piece of cotton wool inside the prosthesis. This helps maintain the shape and absorbs perspiration.
Marking: Place small marking points on the skin along the outer edges of the prosthesis. You can also dab a sponge and Transparent Powder over the edges of the prosthesis whilst holding it against the skin.

Colouring
Tip: For a very realistic skin tone, lightly colour the prosthetic (except for the very edges) with a red tint (e.g. Grimas Special Effects Powder 504 or a red eyeshadow). This suggests naturally flushed skin. A thin layer of Cream Make-up or Covercream Make-up can then be applied over this.
Base: Apply the correct shade of Grimas Cream Make-up, Covercream or Camouflage. For bright fantasy colours, use Cream Make-up Pure or Covercream Make-up directly.
In situations where a lifelike skin tone is less important (such as with wounds), Water Make-up or Liquid Make-up can also be used to colour the Latex Prosthetics.

Gluing and Fixing
Use Grimas Mastix Extra for a strong bond or Mastix Watersoluble for short sessions or in classroom settings.
Application: Apply the glue with the brush to both the back (the adhesive edge) of the prosthesis and to the skin. Do not use too much; the glue must not drip.
Drying time: Allow the adhesive to dry for about 15 seconds (until it feels tacky) before placing the prosthesis on the skin. Pressing down: Press the prosthesis firmly and evenly. If the edges are uneven, use a fine-toothed comb to straighten them and then press them down with a tissue.
Check the edges: Carefully lift any loose edges with a cotton bud dipped in Mastix, allow to dry briefly, and then press them down firmly.

Hiding edges
For a smooth transition between the latex and the skin:
Smoothing: Use Latex-rubber milk or Grimas Eyelash adhesive. Apply a small amount to the edge of a sponge and dab it over the transition between the prosthesis and the skin.
Drying: If necessary, dry the layers with a hairdryer until they are transparent. Repeat this until the edge is completely invisible.
Finishing: Touch up the transition edges with the make-up used and set the whole look with Grimas Transparent Powder or Fixing Powder to fix the result.

Removal

Cleansing the skin
Gently loosen the adhesive edges using a cotton pad or cotton bud soaked in Grimas Mastix Remover.
Massage any remaining adhesive and make-up residue into the skin using Grimas Multi Remover Pure or Cleansing Cream.
Wipe everything off with a tissue and follow up by cleansing the skin with Grimas Cleansing Lotion.

Maintaining the prosthesis
To ensure the latex prosthesis can be used repeatedly, thorough cleaning is essential:
Remove any adhesive and make-up residue from the prosthesis using a small amount of Mastix Remover.
Rinse the prosthesis with water and mild soap.
Dry the prosthesis thoroughly (using a hairdryer on the cool setting if necessary).
Once dry, powder the prosthesis with Grimas Transparent Powder to prevent sticking.
Store the prosthesis in a dry, dark place to preserve the quality of the latex.