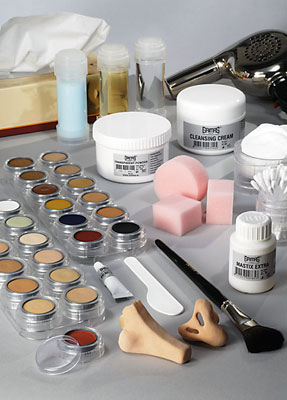


Set out ready for use:
Towel / cape
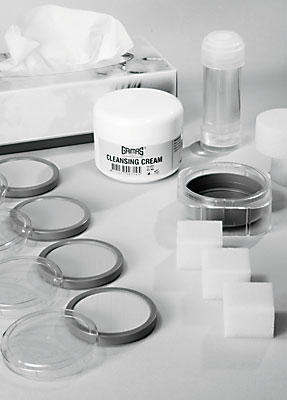
Water bowls
Tissues
Eyebrow Brush
Scissors
Comb
Hairspray
Cotton buds
Cotton wool pads
Old pantyhose (for long hair)
Acetone
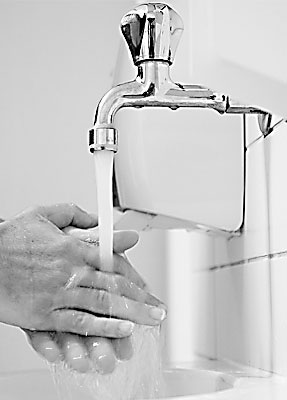
Before starting, you ensure your hands and nails are well cleaned. File your nails if necessary, so that there are no snags. By doing this you prevent damages on the face and risk of infection.
Always work using clean materials (sponges, brushes, spatulas, water bowls) and change the water regularly.
Get the subject to put on any clothes beforehand that have to be put on over the head. Protect your models clothing with a hairdressing cape or a towel.

If the skin is somewhat dehydrated or sensitive, you can apply a thin layer of Grimas Under Make-up Base after the cleansing.
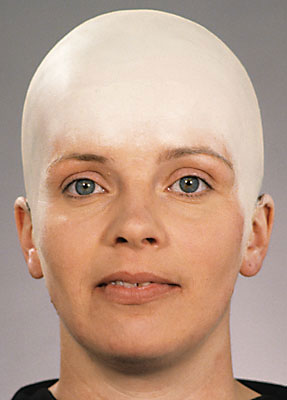
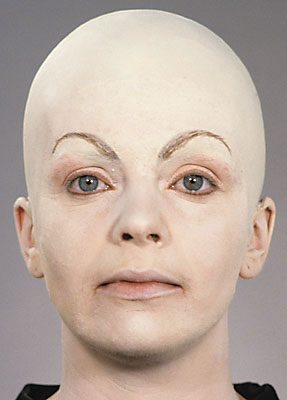
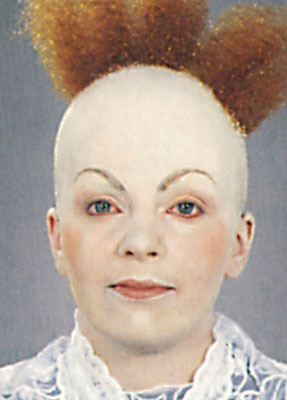
Conceal the natural eyebrows with Eyebrow Plastic.


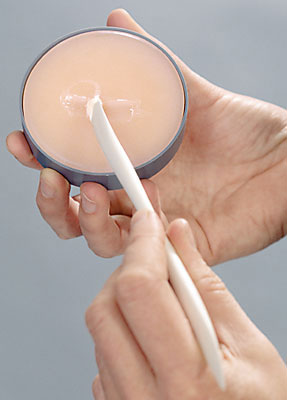
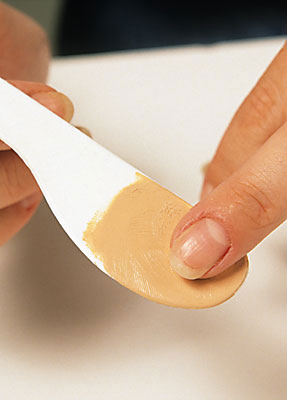
Use the convex rounded side of the Derma Wax Spatula to take the Eyebrow Plastic out of the jar. By scraping it out, you already make the texture a bit flexible.

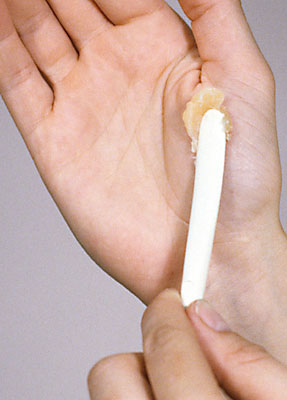
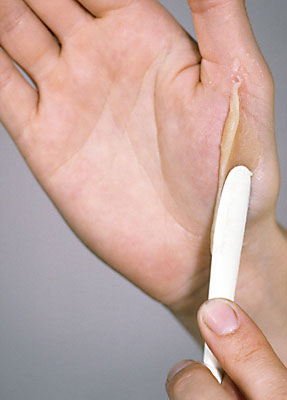
Smooth the Eyebrow Plastic surface and edges off with your fingertips, using a little bit of Cleansing Cream. Then dab it all over with a clean Make-up Sponge. This gives a matt effect and also adds a skin-structure effect. Powder the whole with a make-up sponge with Grimas Transparent Powder to matt and fix it; then turn the sponge over and continue dabbing with the clean side until the excess powder has been removed.


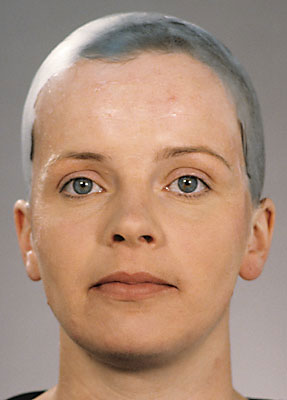

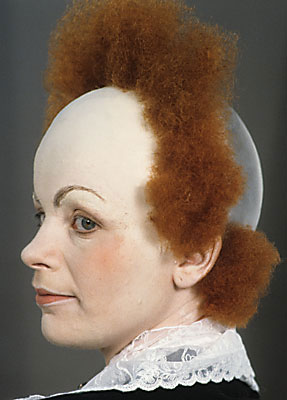
Short hair: shave away hair on the neck, if necessary, make sideburns shorter, and then comb the hair backwards tightly (moisten a little if necessary), and fixate with hairspray. Note: do not use gel.
Long hair: distribute the hair evenly over the head. To keep the hair together, use a cut panty hose (upper leg part). Note: do not use hair pins or combs, as they may damage the Bald Cap.
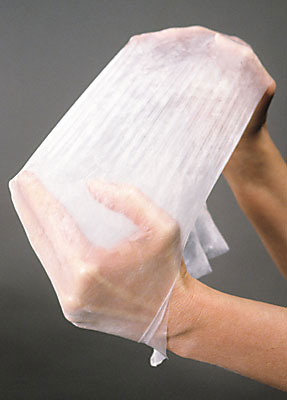
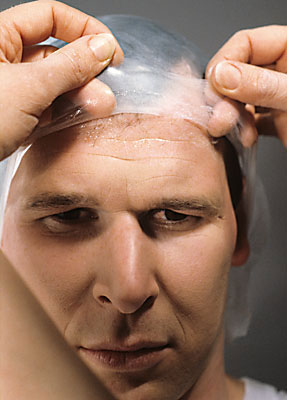
Ball both hands into fists and put them into the Bald Cap, stretching it a little so that you can check it.
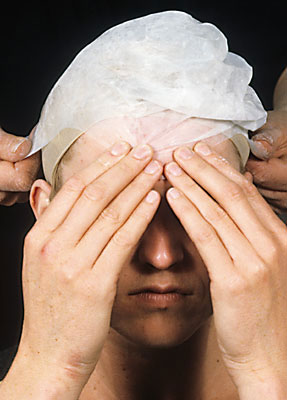
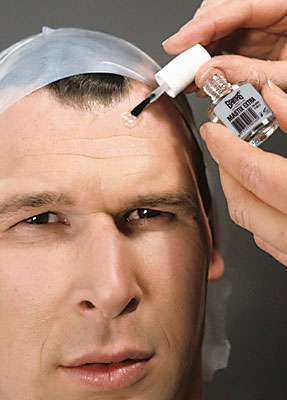
Fold the front edge back and apply an adhesive edge of about 2 cm just below the hairline with Grimas Mastix Extra. For a natural effect, you follow a possible natural line in the forehead.
Let the adhesive edge go as far as the temples.

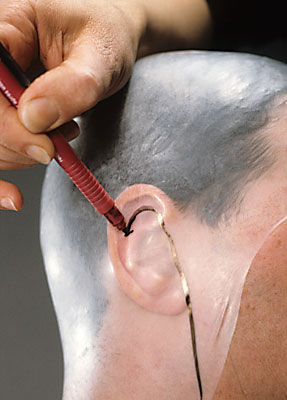
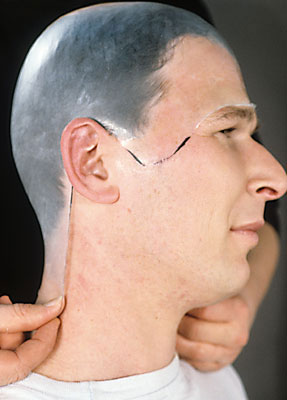
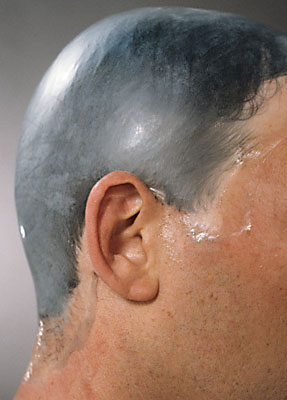
Mark out the ears. A felt-tip pen was used in this example for the sake of clarity. If a Grimas Make-up Pencil for example in a skin tone is used, the result is more subtle and no longer visible later on.
When you finish off the edges with acetone you are also immediately removing the sketch made using the Make-up Pencil.

You should proceed as follows:
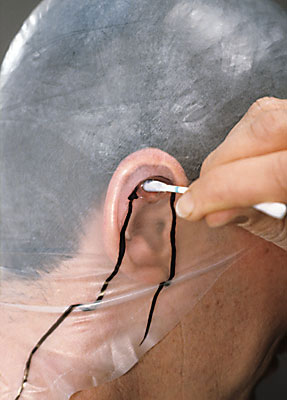
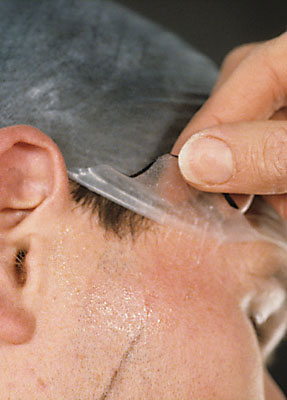
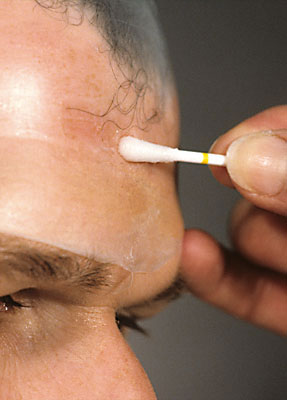
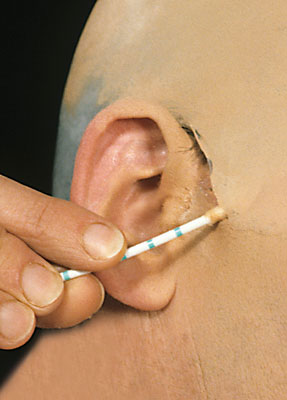
Pull the Bald Cap down at an angle to tense it. Dip a cotton bud in acetone (don't work too wet) and melt a small hole in the Bald Cap at precisely the right place: 2 mm below the point where the top of the pinna (the 'shell' of the ear) leaves the head.
Hint: if necessary, you can melt multiple holes along the line for easy cutting.
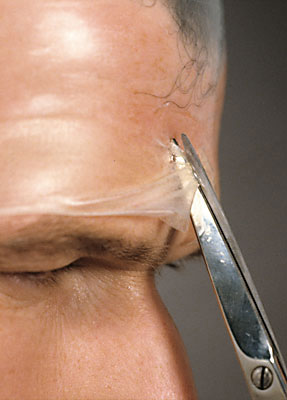
Get the ears out from underneath the Bald Cap.
Get the model that will wear the Bald Cap to sit up straight. Now make a glued edge of approximately 2 cm along the sideburns. Let this adhesive edge fit up exactly against the glued edge on the forehead. There must not be a gap between them.
Use the same principle: fold back, apply adhesive, reposition the side edge, press gently and fold back again. Allow to dry for about 15 seconds and then apply along the sideburns again.
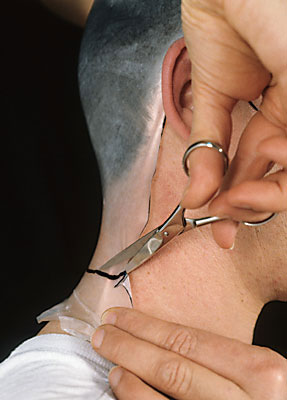
Apply a glued edge of approximately 2 cm along the hairline of the neck as far as about half-way behind the ears.
Fold it open again, allow to dry for 15 seconds and then close the Bald Cap for the last time.
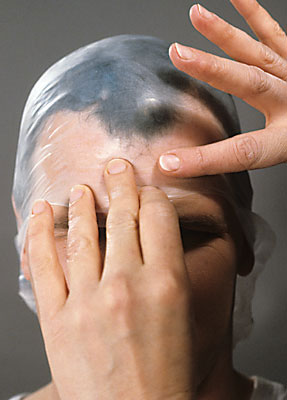
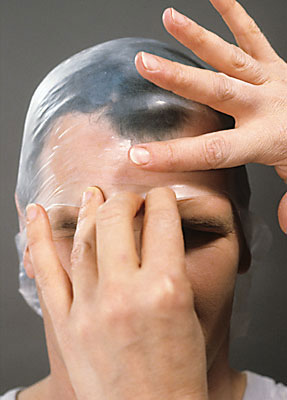
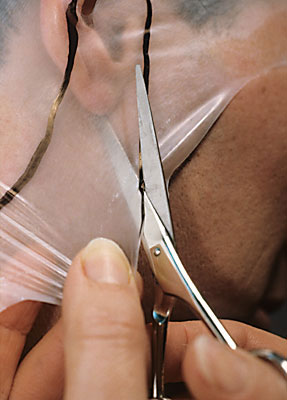
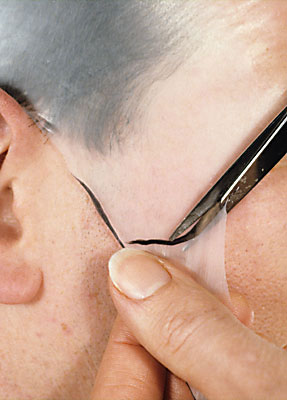
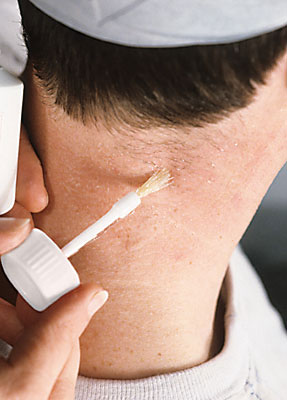
Note: you finish the edges using cotton buds with acetone. You need 15 to 20 cotton buds for this, because the acetone dissolves the plastic. Don't dip used cotton buds back in the acetone.
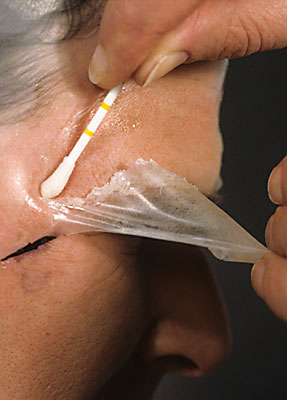
Note: do a little piece at a time, and stay in the middle of the adhesive edge so that you are following the shape of the adhesive edge.
Make a small hole at the middle of the adhesive edge at the back as well; cut up to it and then proceed in the same fashion from the back of the head towards the back of the ears.
You colour the Bald Cap with Grimas Camouflage Make-up Pure or with the intense Crème Make-up Pure colours. Note: don't use Crème Make-up Pure for skin tones, but use Grimas Camouflage Make-up Pure.
Take the Camouflage Make-up out with a clean spatula. Rubbing it with your fingertip will make it softer and easier to handle.
Apply the make-up using a sponge.


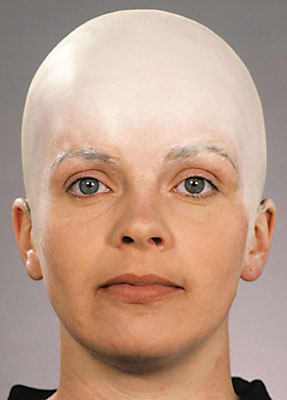
Continue over the face. Apply the make up on top of the Eyebrow Plastic too.
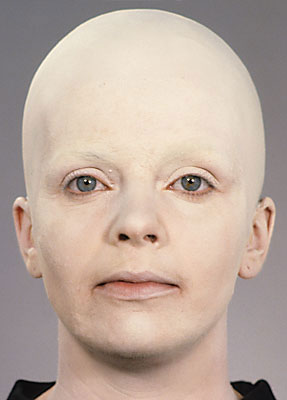
To fix and mattify, you can powder the Camouflage off with Grimas Fixing Powder. If you want to affect the colour more, you can use Grimas Compact Powder or Colour Powder.
Fixing Powder can be applied with a Grimas Velour Powder Puff, a Powder Puff or a Powder Rouge Brush. Gently tap the puff or brush on the back of the hand and then apply plentifully on top of the make-up. Allow to settle in for a waterproof result and remove the excess powder with a Powder-Rouge Brush.


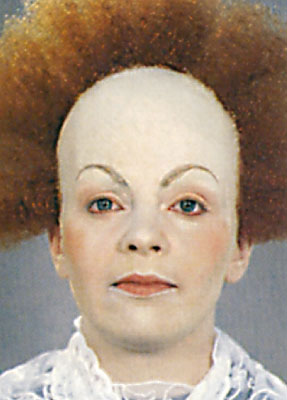
You can make an eyeliner with Grimas Eyeshadow/Rouge and a little Cleansing Lotion. This provides beautiful, taut lines.
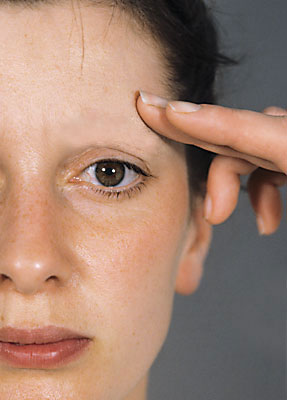
The combination of the raised hairline (thanks to the Bald Cap) and the higher eyebrows makes the forehead look higher.

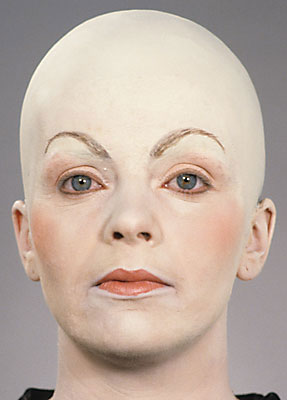
Use the Powder-Rouge Brush to take out Grimas Eyeshadow/Rouge in the desired colour. Put the powder brush vertically and tap with the hand to disperse the powder in the hairs so the powder does not just end up on the tips of the hairs. Smooth the colour out with the flat side of the brush, so do not dab it on.
Eyeshadow
With the same colour of Eye Shadow/Rouge you apply an eye shadow.
Lips
Make the lips look glum by keeping them narrow. Take the Lipstick (Pure) onto a spatula (even if you are working from a stick) and apply it with a lip brush. First colour the middle of the lips and then colour the edges, working from the outside inwards. Dab the result with a tissue to matt it off.


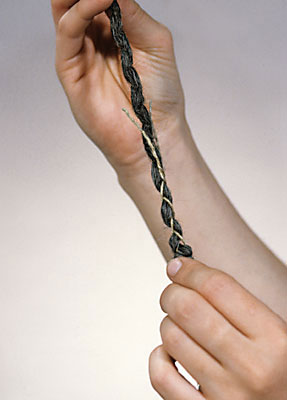
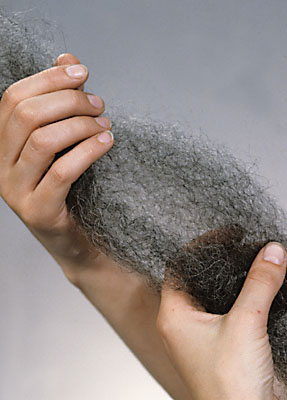
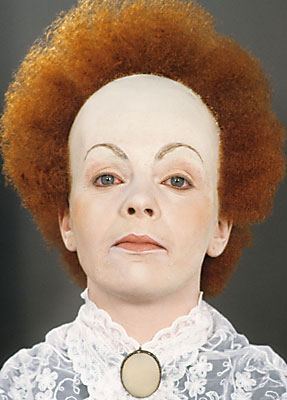
You create a hairline using Wool Crepe.
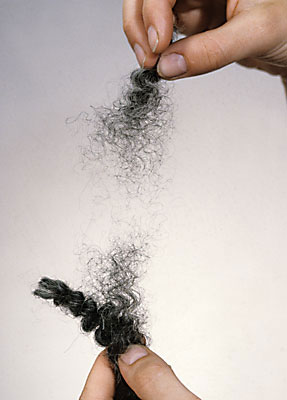
Pull two braids of about 50 cm of Wool Crepe loose from the strings around which it has been wound.

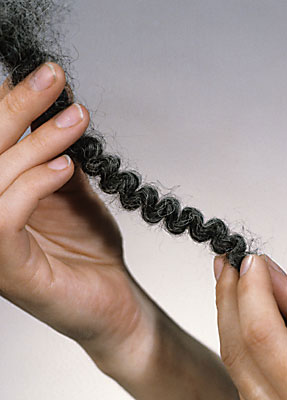
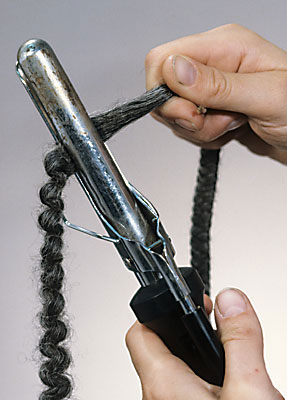
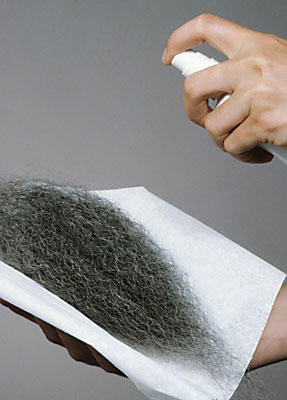
Straighten the part you are working with, using a curler, styling tongs or an iron (on the 'wool' setting), until it has a slight wave.
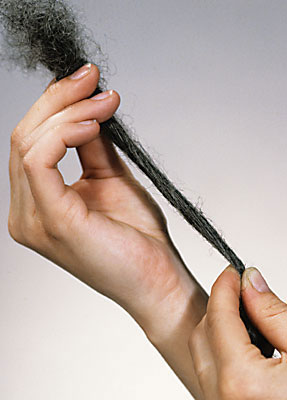
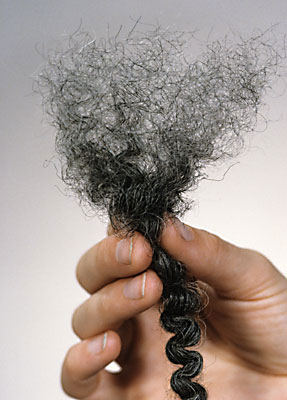
Now make the piece that you are working with longer and looser: run it through your hands and pull it gently bit by bit in the lengthwise direction, but so that the piece still remains intact.
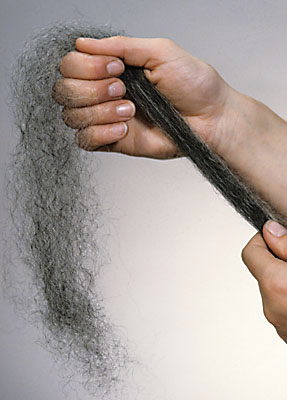
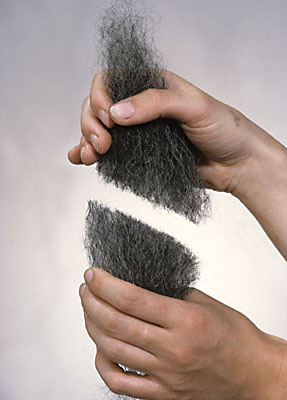
If you want, you can mix the tuft with Wool Crepe of another colour.
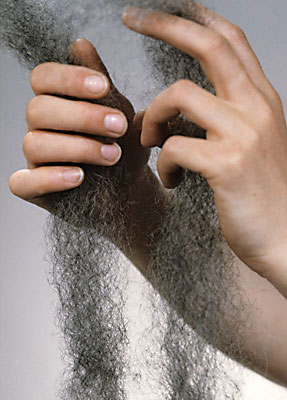
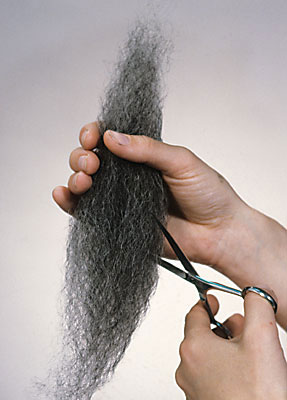
Pull the loosened string into three equal pieces. Do the following with each of the pieces: pull the piece loose in the middle, in the lengthwise direction with the hairs; then place the two pieces on top of each other and divide them into two again.
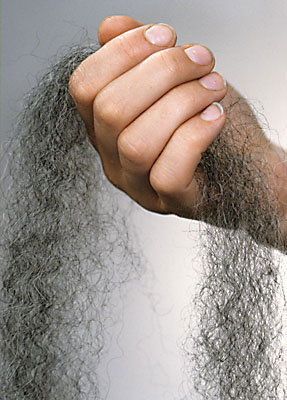

Note: using hairspray or plastic spray on the Wool Crepe will make it inflammable.
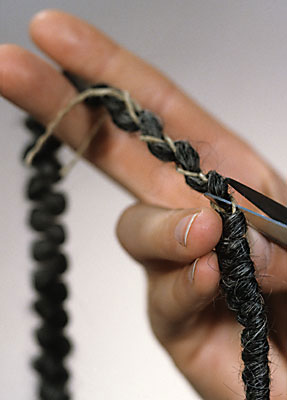
Work piece by piece. Apply glue to the part of the skin concerned and press the cut surface/obliquely cut side into the adhesive. Please note: keep the cut edges well together while attaching.
Press the adhesive edge onto the skin with one hand, and model the Wool Crepe pieces together with the other hand. You do this with the end of a pin-tail comb or the back of a brush, until the edge becomes a single area. Please note: do not comb!
Please note: do not comb!
Detach the adhesive edge with a cotton bud soaked in Grimas Mastix Remover. Remove the adhesive and make-up residues with Mastix Remover. Scrape the Eyebrow Plastic off the skin with the spatula. Massage Grimas Multi Remover Pure or Cleansing Cream into the skin and remove with a tissue. Cleanse the skin afterwards with cleansing lotion.